How To Record Expenses
Many property manager's use PaTMa to keep track of their investment properties as a way of amplifying and gearing their returns by analysing expenses and income. PaTMa has the ability to record all mortgages and property values and displaying instant visual data of the information recorded. However, to make the most of this feature, you have to account for the expenses.
Getting Started
- In the header, navigate to Properties.

You will be directed to a page listing your current properties.
Note: With the free version of PaTMa, you can only manage one property at a time. To add more than one property to your account. Upgrade to a Premium Account.
- Click the Property Name you wish to account a payment for.
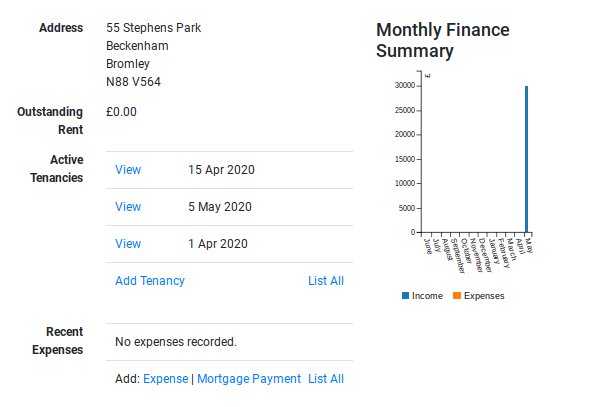
A page displaying the property's information will be presented with details of the Property's Address, Tenancies, a Finance Summary and Recent Expenses.
- On the page, locate the column title Recent Expenses and click Add: Expense.
Alternatively
- Navigate to Properties.
Note: This is located in the header of the website, as shown below.
Your properties will be displayed on the screen, listed with the name and address.
- Click the Property Name you wish to add an expense to.
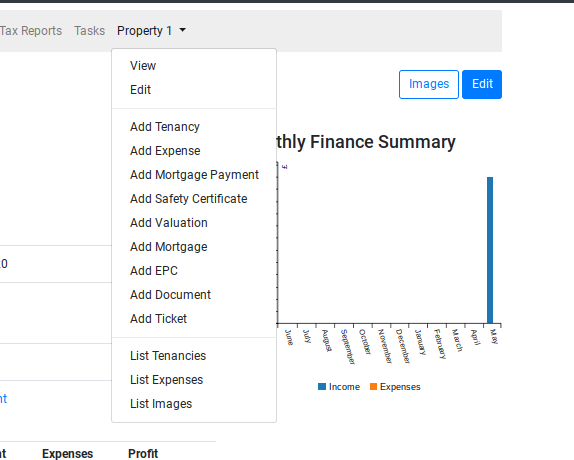
In the right corner, the property's name will be displayed with a downwards arrow.
- Click the arrow, to enable the dropdown menu and select Add Expense.
You will be redirected to a page displaying a form that you will need to fill in with the tenancy agreement details.
Filling In The Form
Invoice Date
Enter the date by which the invoice was issued for payment.
Date Paid
In this field, enter the date the mortgage was paid.
- Click on the field to enable the Calendar and select the relevant Date.
Payment Method
Specify the payment method used (eg. Cash/Card).
Amount
Insert the amount paid in total.
Supplier
In this field, use the dropdown menu to select the supplier of the certificate.
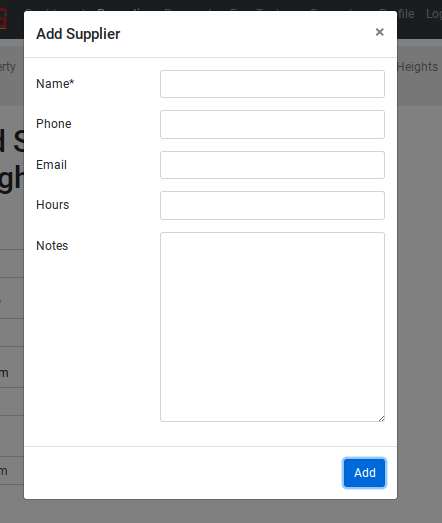
Note: If this is the first time accounting for a safety certificate, you will have to fill in popup form with the supplier's name and details. In this case: - Click Add - Enter the supplier's Name, Phone, Email, Opening Hours and Additional Notes (eg. Account No.)
Description
Add a brief description of the cause of expenses and any other essential details that aren't covered in the fields provided.
Tax Category
In the dropdown menu, select the most relevant tax allocation to the expense paid (eg. Legal & Professional Fees).
-
Upload a scanned copy of the original invoice/receipt.
-
Once completed, select Save.
- If you wish to continue on to create another payment, select Save + Enter Another